OK, now that you have the right equipment and understand shutter speed, aperture and depth of field, you're ready to start shooting pictures of your SPs.
OK, you've
got the equipment and you understand how to control your camera to use shutter
speed and aperture effectively.
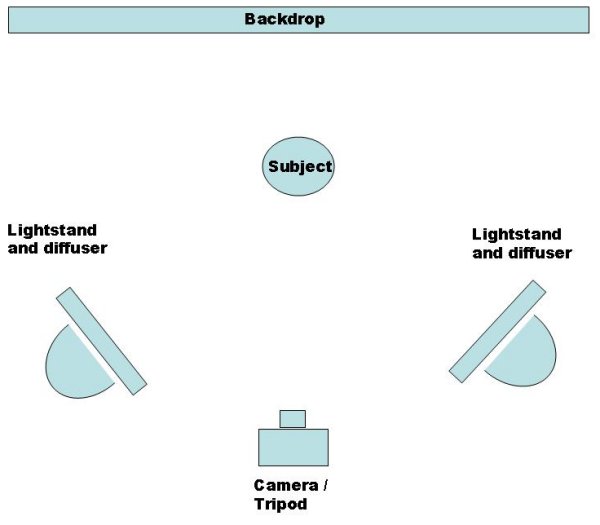
Let's start with taking a picture of one figure in a very simple, two-light set up.
I've included two drawings below to give you a top view and side view on how to set up things up.
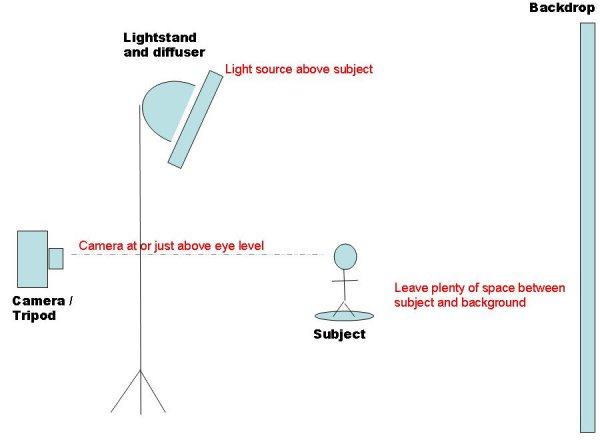
Things to notice:
You've just about ready to shoot some good, reliable pictures of your subject. A couple more steps to take:
You are ready to shoot. Set the camera into AV mode and set your aperture to a low number - 2, 2.8, 4, or 5.6. (If you're using a point and shoot camera, set it to portrait mode.) Compose the picture by zooming in and focusing. Step back from the camera and count to three, then release the shutter to take the picture. (When you make adjustments on the camera, that causes the camera to shake. You need to give it a couple seconds to finish shaking before you shoot or else you'll get blurred shots - that's why you count to three before shooting.)
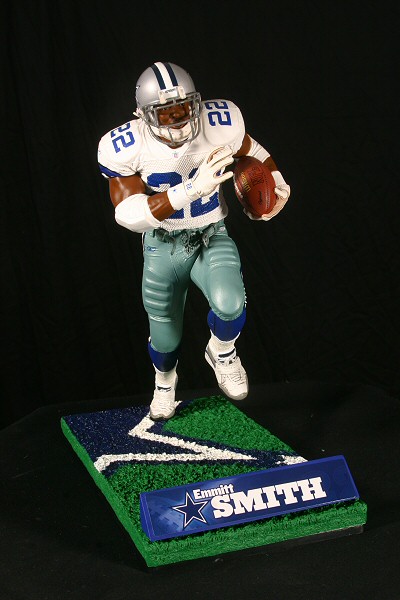
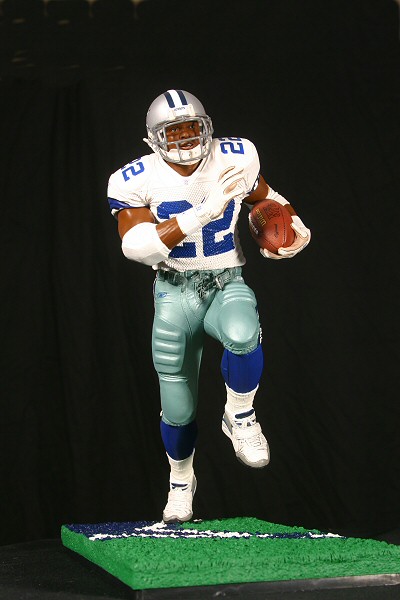
Now you're going to take the picture again, but you're going to change the aperture up by a few clicks. If you shot the first shot at 2, change it to 5.6. If you did the first shot at 5.6, change it to 8. Then count to three and shoot again. After that, do it again - change the aperture up to 8, then do it again at 11, then at 16, then 22. You're going to end up with several copies of the same picture. But when you look at the photos you will see the effect of DOF. Some will have too small a DOF, some may have too large a DOF. But if you bracket like this and shoot several versions of the same shot, you'll end up with at least one that gives you a DOF you're happy with.
Now you can move your subject and try it again. Put your F-stop back to its widest option (like f2.8 or f4) and then take a series of pictures, changing the aperture to adjust the DOF.
After you've taken several angles of your subject, download the pictures and check them out. You will see how DOF can be managed by adjusting your aperture, and you'll start to develop a feel for what apertures work best to create the look you want.
You can stop here. You now have the knowledge to take nice, functional pictures of your SPs. From here on out I'm going to talk about some things you can do to improve the photos even more.
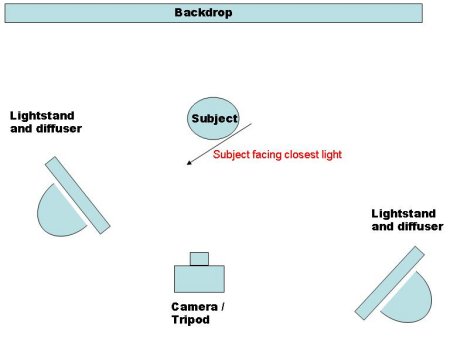
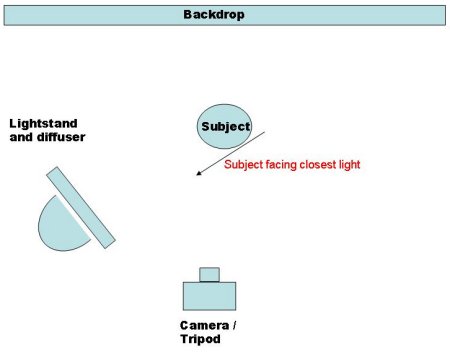
Setting up the two cameras at 45 degree angles provides a nice, safe light coverage on your subject. You can also move the lights around to create greater contrasts between light and dark areas for other photographic effects.
For example, if your SP is facing to the left you can move the left floodlight in closer, pull the right floodlight back and the shadows on the backside of the figure will be more pronounced.
You can increase this effect by turning off the right floodlight completely and just holding a white posterboard to the right to bounce a little light onto that side of the subject.
This is another reason why you should use a remote shutter release. Besides the fact that pushing the button causes camera shake, if you have a remote you can step away from the camera and hold reflectors or do other things while you shoot.
If you move a light in where it is closer to the figure than the camera, watch out for lens flare. This happens when part of the light actually shines into the lens and it washes out the image. If you start to experience lens flare, just get a piece of black poster board and hold it between the light and the camera. Look through the viewfinder to make sure the cardboard isn't in the image. But this board will block the light going into the lens from the side and eliminate the flare.
Moving the light can make a tremendous difference. Look at the three shots below. Each picture tells a different story, and the difference was created by moving one light slightly and (in the third shot) turning off the second light.
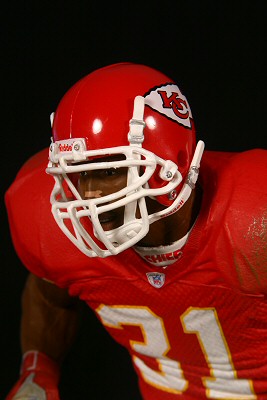 | 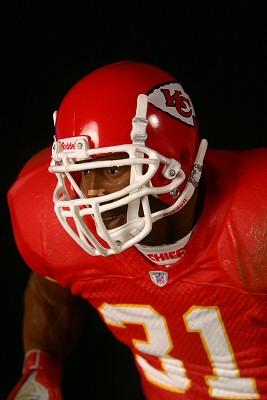 | 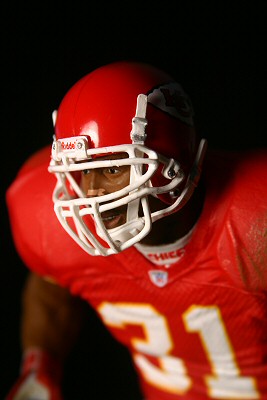 |
| Main light close to figure, above eye level. Fill light further away. Emphasizes team logo on helmet and contour of helmet - face de-emphasized. | Main light dropped to eye level. Fill light left unchanged. Now the face takes on greater importance. Shows good detail but still lets you see the face - a nice balance. | Main light left at eye level. Fill light turned off. Now the face is everything. Can't even see helmet logo. Shallow DOF enhances the effect. This is much more dramatic but you lose some details. |
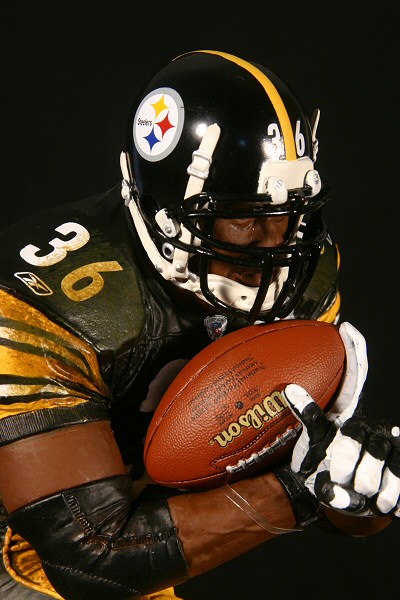
As you move the lights around, pay close attention to reflections. SPs have shiny finishes on them, particularly on the helmets. Depending on where you place the lights, their reflection may wash out a logo or some other part of the subject that you want to be seen. Watch out for glare! For example, I like the photo below but I don't like how the glare wipes out the 3 on the helmet.
Now you can start moving the camera. Do you want to make your subject look bigger, almost larger than life? Bring the camera very close to the subject, put it below the subject so you're shooting up at it, and then use as wide an angle as you can. Don't zoom in - use a wideangle lens. Look at the following two shots - one was shot above the figure, the other was taken about at belt level. It creates a different effect even though the change is minimal.
| Above Eye Level | Below Eye Level |
 |  |
Want to create more of a demonic look? (Yankee fans will like this when shooting pictures of custom Red Sox SPs.) Move the lights below the subject so the light strikes the undersides of the features. If you watch any old monster movie you'll see they light the monsters from the ground up to give them a more evil look. You can enhance this even more by getting the camera in close and using an extreme wideangle lens to distort the features. Actually, this effect would probably work well for photographing Spawn figures more than SPs.
 What
about silouhettes? These can be a little tricky, but you can get a nice silhouette
shot by using only one light, behind and below the subject. Point the light at
the backside of the figure and make sure all lights from the front side are turned
off.
What
about silouhettes? These can be a little tricky, but you can get a nice silhouette
shot by using only one light, behind and below the subject. Point the light at
the backside of the figure and make sure all lights from the front side are turned
off.
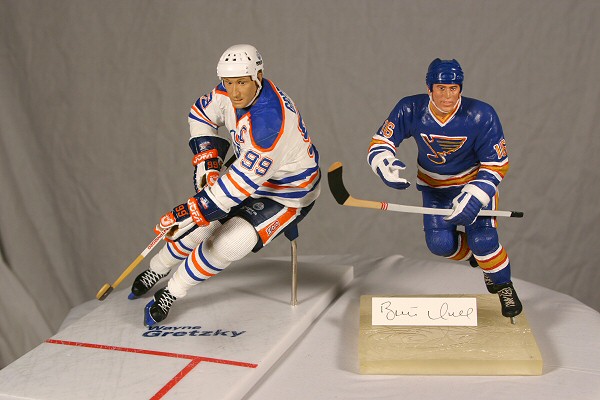
Grouping figures also results in nice photos, but group shots can be tricky. First, you must be sure to use a DOF that gets all the subjects in focus. So be sure to bracket like a maniac to ensure you get one that works. Second, you must be careful of shadows. The light striking the figure on one side doesn't get through to the figure on the other side. That puts one figure in shadow. This can be pretty subtle - maybe it's just one figure's arm blocking the light from reaching the other figure. Look at the group shot to the right. Hull's stick creates a shadow on Gretzky's jersey, but it's subdued and out of the way so it doesn't create a problem. If Hull's stick was pointed up, however, the shadow could easily fall on Gretzky's face - ruining the shot.
For group shots, try moving the main light directly over the camera - it can be a few feet above the camera, but not to either side. You could then place a second and third light at the 45 degree angles (or even greater) to the sides to fill in some smaller shadows on the image.
Closeups are also nice to shoot. Just remember that if you're shooting high resolution photos that will ultimately end up on web pages, you can crop them quite a bit. So you don't have to worry too much about extreme close-ups unless there is a specific feature you really want.
OK - you've got enough info now to get some good studio-styled shots of your customs. Take lots of shots with varying apertures to get the DOF you want. Start with a basic light set up and then move the lights around for some neat effects. Then try moving the camera up and down.
Good luck!
Sibelius
Index - Equipment - Shutter speed, aperture, depth of field - Shooting your SPs